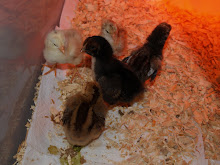
After setting the eggs, it's customary to wait until day 7 to candle. This gives the little chicky time to start growing.
I'm not sure if you know this about me or not, but I'm incredibly impatient. Hence why I am starting our homestead on 1/2 acre in a lake community neighborhood instead of waiting until Jeremy and I have saved the moolah for a bigger piece of property. No time like the present, right?
On day 3, my curiosity got the best of me and I decided I was going to candle just one. I grabbed Jeremy's little hunting flashlight and took out the one white egg (egg #16) in the incubator. The white one should be the perfect one to use because it's harder to see anything in the brown shelled and green shelled eggs. I held the light up to the egg and gave a little peak. It was at this point that I realized I have no idea what I'm supposed to be looking for. At day 3, there might be some veining, but it would be light. I can't see anything. Just looks like an egg if you ask me.
On day 4 (patience, anyone?), the incubator needed humidity. And if I had to open the window, well...I might as well make good use of the temperature loss, right? So I grabbed Jeremy's little hunting flashlight and the white egg. I still have no idea what I am doing. I still can't see anything. I pulled out a green egg (egg #18). I held the flashlight up to the bottom of that one. Whoa, whoa! Wait! The green one was different. It was completely dark at the top and was still see thru at only the bottom 1/3. But where is this veining I keep reading about? So at this point I am now a little concerned that maybe I'm not actually growing a chick in the egg, but maybe a time bomb. Maybe this egg is filled with a nasty stinky goo that would be growing more nasty and stinky by the hour.
I went to my newest favorite place on the internet (after Facebook, of course) and posted a thread on www.backyardchickens.com . Someone suggested getting an LED flashlight as it would be brighter and allow me to see more. No one seems overly concerned that my egg might be filled with something gross, but I couldn't quite get the image of what my incubator would look like with an exploded rotten egg inside.
So yesterday, on day 5 I braved the elements and went to Walmart in search of a new candling flashlight in the middle of a snow storm.
The girls and I crowded into my bedroom and I gave each of them a task. Maggie was in charge of the light switch and Lizzie was in charge of the Sharpie marker. I opened the incubator and with shaking hands - seriously I was soooo nervous - I started at egg #1 and we worked our way through to egg #24.
Maggie lost interest by egg #12 and went to play. But Lizzie actually got pretty darn good at candling. About half way through, I started asking her opinion and let her decide how we were going to mark them.
x = nothing, completely clear
? = There was something going on but we couldn't see any veining. We aren't sure at this point if the embryo has died or maybe wasn't quite as developed or if the shell was too dark to determine
:-) = All looks good. There was veining: Sign of life!!!!!
Here were our results:
#1: x
#2: x
#3: :-)
#4: :-)
#5: :-)
#6: x
#7: x
#8: :-)
#9: :-)
#10: ?
#11: :-)
#12: :-)
#13: :-)
#14: x
#15: ?
#16: x
#17: ?
#18: :-)
#19: :-)
#20: ?
#21: x
#22: ?
#23: ?
#24: x
x = 8
? = 6
:-) = 10 !!!!
We decided to give the X's another 2 or 3 days, just to see if anything changes. At this point, I would be very surprised if they did anything. But we'd hate to toss them if there's a chance. We're hoping to see change in the ?'s. If not, they'll be tossed with the x's.
How exciting! Potentially 16 chicks! I guess it's time to start thinking about the brooder. And I really have to start designing the coop and run. It would not be good to have full grown chickens living in the house with us because we haven't gotten their home built.
Only 15 days until hatch day!

No comments:
Post a Comment